
So you’ve taken an introduction class about Japanese hand planes (or kanna) and excited about the potential. Though, first you have to admit that you have a kanna problem: what is your path forward to broaden incorporating Japanese hand planes into your woodworking processes? If you are more reliant on hand planes than machines, the course-medium-fine paradigm (link https://dkdesignwv.com/2024/02/02/course-medium-and-fine-japanese-hand-plane-edition/ ) is a helpful approach to tailor your hand planes to different tasks required to convert rough timber into finished furniture parts. In short, you create a posse of Japanese hand planes set up to do different tasks.
The next question is how do you populate this posse? Do you purchase all new or take an alternative path? The approach that I’m going to advocate for here is to enter the used kanna market and rehab an older hand plane to bring it into the fold. Ultimately the kanna on the used market were put on the shelf for a reason – possibly the retirement of the carpenter or a lapse in maintenance that made the plane difficult to use. In rehabbing used planes, it requires an eye for identifying a professional-level tool and understanding what makes them work well in order to diagnose what is going wrong with the rehab one. I’ve written in more detail about the things that you should consider when rehabbing an old kanna (link https://dkdesignwv.com/2023/05/18/kanna-curious/ ). Here I’m going to walk though a case study.
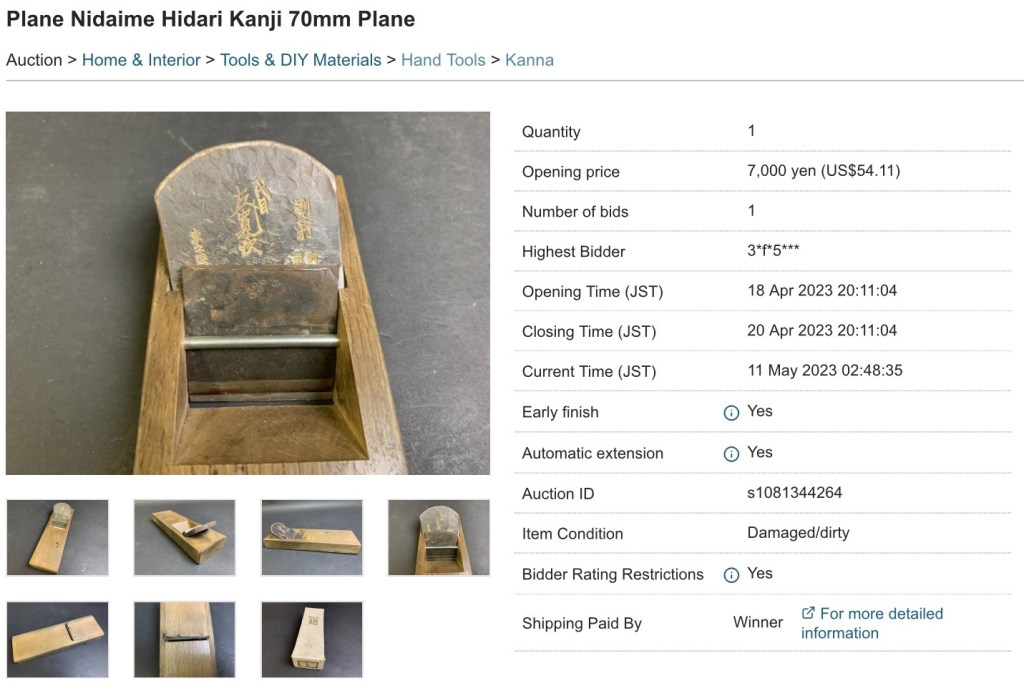
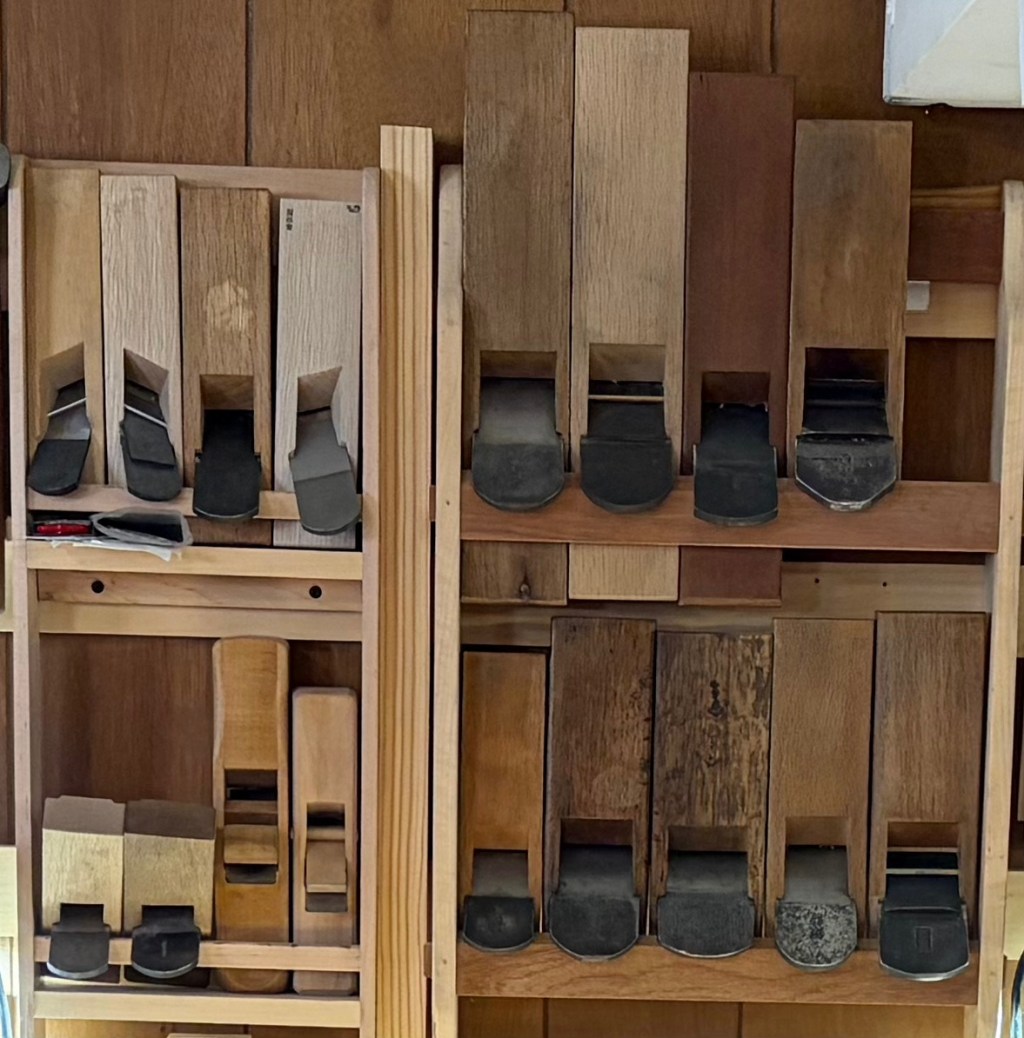
There are multiple on-line sources for used kanna, including eBay and Yahoo!-Japan. Looking at this ad on Yahoo!-Japan (Figure 1), I saw indications of a professional-level tool, including remnants of a tsutsumi mouth ledge, a dai stamped with a dai-maker’s stamp, a laminated chipbreaker held in place by a high quality pin (i.e., not a nail), and black flecks observed in the jigane suggest a high quality blade. I won the auction, as I was the only bidder, and waited for it to arrive. The auction price wasn’t too bad, though shipping costs and tariffs were tacked on to bring the tool to my door.
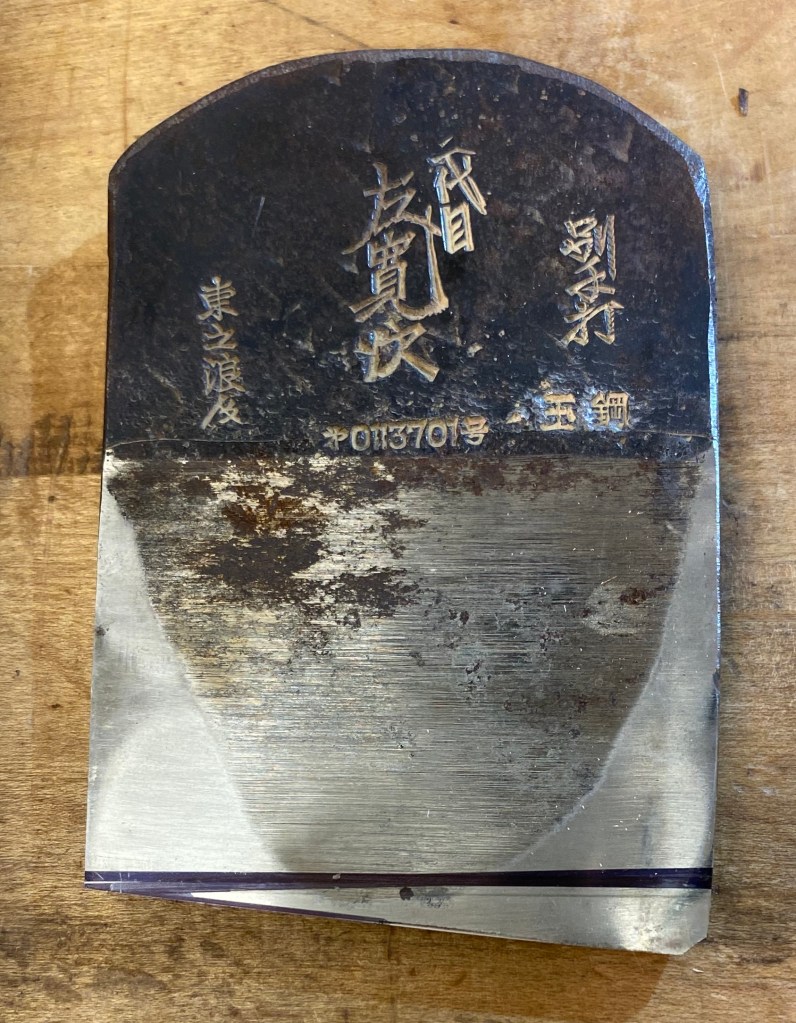
When it arrived, the reason for this kanna being placed on the shelf was quite obvious (Figure 2). It seems that the previous owner had a bias while sharpening the blade. It resulted in the cutting edge becoming extremely skewed. The owner tried to compensate by widening the blade groove in the dai. Ultimately continuing down this path was too much work. Instead of correcting the angle of the cutting edge, which may take quite a long time when done by hand, it was put on the shelf.
To rehab the plane, I focused on two things: restoring a correct cutting edge on the blade and modifying the dai to better support a correctly oriented blade. In restoring the cutting edge, I struck a line with permanent marker and then removed the bulk of the metal with a hand-crank grinder, as to not lose the temper. The bevel was restored to 27 degrees using a modified eclipse-style sharpening jig. With the correct bevel, I trimmed back the mimi and performed ura-dashi to restore the blade to a state of readiness for action. The dai modifications involved gluing in a shim to narrow the blade groove in the dai and removing what remained of the tsutsumi. I opted for starting with dai modifications instead of cutting a new dai because it seems that there still was good thickness of the dai and the chipbreaker pin was well-placed to provide excellent support for the chipbreaker. These modifications were sufficient to restore the kanna to working order. Normal strategies learned in the intro class to maintain the kanna in a usable state could then be employed going forward. Hopefully, this kanna will become a welcome addition to someones kanna posse and provide many more years of service.

3 responses to “Rehab for the kanna junkie”
[…] How close depends on how thick of a shaving you are taking. One of the ways that you can tell that the chipbreaker is working is that shaving changes characteristics. When the chipbreaker is not acting, the shaving tends to curl up in front of the blade. When it is acting, the shaving tends to flow straight out of the plane and goes over the back of the blade. Adjusting the width of the blade right at the cutting edge (by grinding back “ears” on the blade) relative to the width of the chipbreaker can really help you see where the chipbreaker is relative to the cutting edge from the bottom of the plane. Chris Hall has a great discussion of this in his kanna eBook, and I explore similar setup challenges in my post about restoring used Japanese hand planes. […]
LikeLike
[…] So then how then does one bring back a used Auction find into a usable state? Just like when you take a used car into a mechanic, they have a checklist to assess what needs to be done to make sure that this used car is safe and reliable. So let’s create a checklist to assess the state of a used Japanese hand plane. As an illustration, I walk through a complete restoration case study in my rehab post. […]
LikeLike
[…] are fun to use. For practical guidance on implementing Japanese hand planes in your workflow or restoring vintage kanna, explore my other posts on Japanese hand […]
LikeLike