
Maybe through motivations of cost or safety, using hand tools to build furniture is experiencing a resurgence of interest. In Christopher Schwarz’s article “Course, Medium & Fine”, he talks about how hand planes are used to convert a rough sawn board into lumber that is planed flat and to the appropriate thickness and width. This is the foundation for building furniture from wood by hand, a skill that has diminished due to over-reliance on woodworking machines. In this article, he also relies primarily on western metal-bodied hand planes. Metal-bodied hand planes share evolutionary roots with other types of hand planes, such as ones from Japan.
If you’re new to Japanese hand planes, I recommend starting with my beginner’s guide to kanna, which covers the basics of what to look for when selecting and setting up your first Japanese plane.
Japanese hand planes have some advantages over western hand planes particularly when it comes to weight and the quality of the steel used for the cutting edge of the blade. The weight factor becomes particularly important when one renders rough sawn boards into lumber primarily by hand. This is one of the reasons why woodworkers become intrigued by Japanese hand planes.
One of the challenges with incorporating Japanese hand planes into one’s furniture-making workflow is that contemporary Japanese woodworking is not a great model for learning about this. Culturally, carpentry – that is making homes and buildings out of wood – has historically played a larger role in the Japanese woodworking community than furniture-making. Moreover, power tools play a predominant role in the contemporary process with the hand plane reserved for final finish work. In the next few paragraphs, I’d like to like to discuss how I use Japanese hand planes in the context of a hand-tool workflow using a recent build as an example.

Design
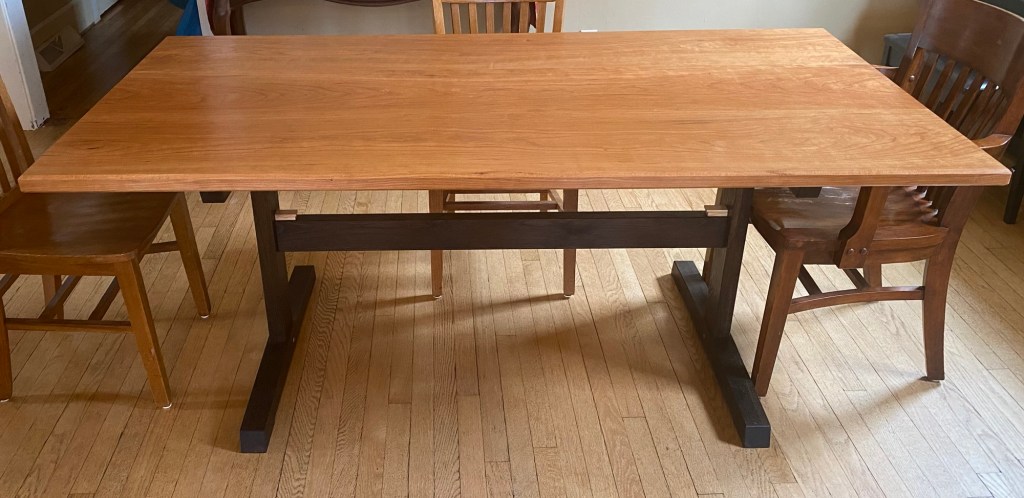
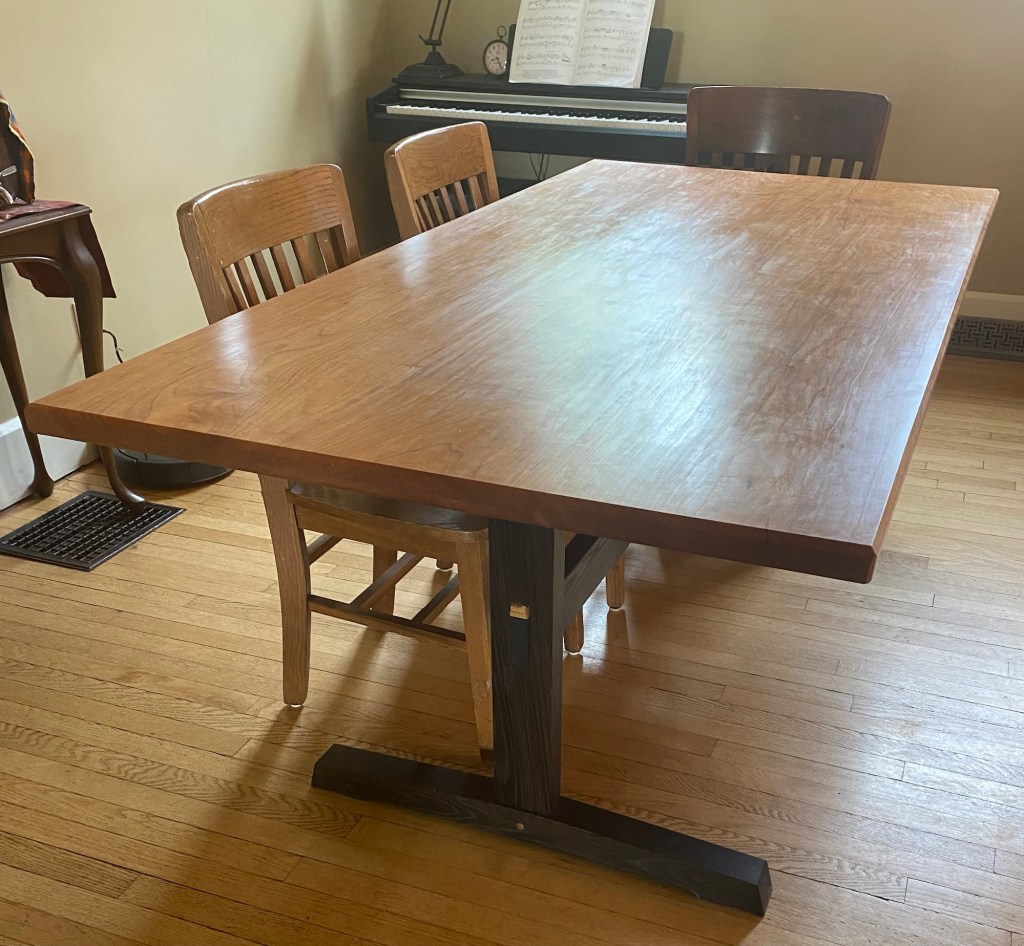
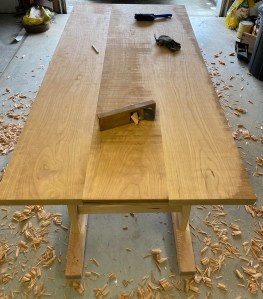
All builds start in the design phase. In the design phase, one identifies constraints related to the built object. Here I designed a dining room table. Key functional constraints include the height of the table for a comfortable eating experience and horizontal space for a certain number of people, given the size of the room and common size of the group eating together. Here, I’m going with a party of six – one on each end of the table and two on each side. Aesthetic constraints include what woods and furniture style would blend well with other furniture in the room. Here, we have cherry built-ins and tend to prefer unadorned simple designs – so decided on a trestle table design.
lumber.
Some of the motivation to build this table was getting some 12” wide cherry boards from an urban lumber sale organized by the West Virginia University Office of Sustainability. The cherry boards were from a cherry tree that fell in the WVU Arboretum, milled, and offered for sale in 2021 for – wait for it – $1/bf. I was able to get 5 clear boards that were 12” wide by 8’ long. Two of the boards were 6/4 and the rest were 4/4. Originally I thought I would make the table top from the 4/4 boards and the understructure from the 6/4 boards. However after prototyping the top, I felt that a 6/4 thick top looked better. Ripping all of the 12” wide 4/4 boards into narrow strips for the understructure seemed like a waste of such wide clear boards. So instead, I decided to use what I purchased at the 2022 WVU lumber sale, which was white oak from a tree that came down near the WVU Book Repository that was flat-sawn into 4/4 boards roughly 6” wide by 4’ long. As these weren’t the prettiest of boards with uneven grain and a bit of spalting, I decided to laminate them together to provide the understructure of the trestle table and ebonize the oak with iron acetate solution. The ebonized oak is a nice complement to the dark pitch pockets in the cherry.
To showcase the wide boards, I joined three boards together to form a table width of about 36”. As I had only two 6/4 boards, I used a 4/4 board in the middle of the table top and 6/4 boards on the sides. I laminated shorter 4/4 boards to the underside of the center 4/4 board on each end so that the top had a consistent thickness from all edges. I then planed down the excess using a rough and medium planing strategy. As this is the underside of the table, fine finish planing is not needed.
Lumber Prep
In terms of the rough, medium and fine steps, rough planing involves taking thick shavings around 0.03” to remove material quickly. According to Moxon, this produces shavings as thick as an “old groat”, which apparently is like a rolled oat. Rough planing also involves traversing the boards with the planing action oriented perpendicular to the grain of the wood. Traversing reduces the force required to hand plane thick shavings and the potential for creating tear-out, which I will discuss later. The medium step provides a transition from the surface obtained following rough planing, which can have some ridges and hollows and severe tear out, to a surface that is flat enough to take continuous shavings. The medium step also transitions from planing perpendicular to the grain to planing with the grain. The fine finish step involve removing any last imperfections with shavings around 0.0015” or thinner and planing primarily aligned with the wood grain.
For shaping the table top, I used Japanese hand planes entirely. Using hand tools instead of power tools for this work requires building specific skills, but offers a more accessible and satisfying approach to woodworking. Following laminating the oak for the understructure, I used a bandsaw for rough shaping and Japanese hand planes for the rest. In the rough and medium steps, the curvature of the cutting edge of the blade becomes important. In the fine step, understanding how the chipbreaker works becomes important. In the next sections, I’ll talk a bit more about blade curvature and setting the chipbreaker.
Oh so sexy – Blade Curvature
For rough shaping, you are aiming for shavings around 0.03” thick – thicker with softer woods, like pine, and thicker for harder woods, like oak. With shavings that thick, you need an open throat in the plane body. While tear out is less important at the rough shaping stage, different strategies are used. First, a curved blade is used so that the thick shavings are cut from the surface instead of torn, if a straight edge blade is used. The curvature of the cutting edge can vary based on the width of the blade and how aggressive you want it to cut – from say a 5” radius on a 50mm wide plane blade to more like a 9” radius on a 65mm Japanese plane blade. One tends to use a narrower plane to take thicker shavings due to the physical challenge in moving the plane across the wood.
As Japanese plane blades are typically sharpened by hand on a flat waterstone, how does one go about setting up a curved blade? While one can do this all by hand, I decided to modify an Eclipse sharpening jig to more quickly establish a curve on the blade. Eclipse-type sharpening jigs are relatively inexpensive (about $15) and have some advantageous design features. First, they are made out of a soft alloy – I think aluminum – that you can easily shape with a file. Second, they have a relatively narrow roller so that you can tilt the blade from side to side with some hand pressure, which aids in creating curvature.
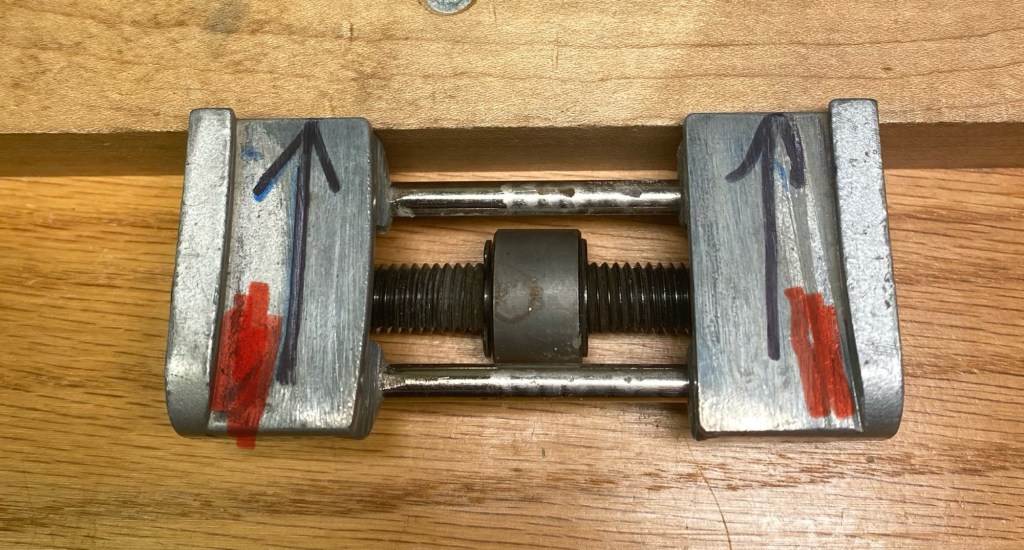
Modified Eclipse-style sharpening jib with “ears” filed back in the areas indicated by the red highlighting.
Un-modified, an eclipse-type sharpening jig doesn’t work with a Japanese plane blade. A Japanese plane blade is tapered in width such that the narrowest region is down by the current edge. When an un-modified eclipse-type jig is clamped to the blade, a single pinch point at the back edge of the jig is created. This pinch point is a point of rotation such that when the blade and jig is placed on the water stone, the blade rotates away from the jig since the jig provides no support behind the pinch point to counteract the upward force created by the contact of the tip of the blade to the waterstone. To move the pinch point forward on the jig (towards the cutting edge), I filed the “ears” of the jig at the back edge a bit to create a bit of taper in the pinching action. This moves the point of rotation forward and allows the jig to work as designed for a Japanese plane blade. I then use the jig to establish a curved cutting edge on the plane blade using a rough diamond stone. Once the curvature is established, you can sharpen the blade by hand on a waterstone by focusing on sequential segments of the blade. This jig also comes in handy when you want to re-establish the correct bevel angle on the blade.
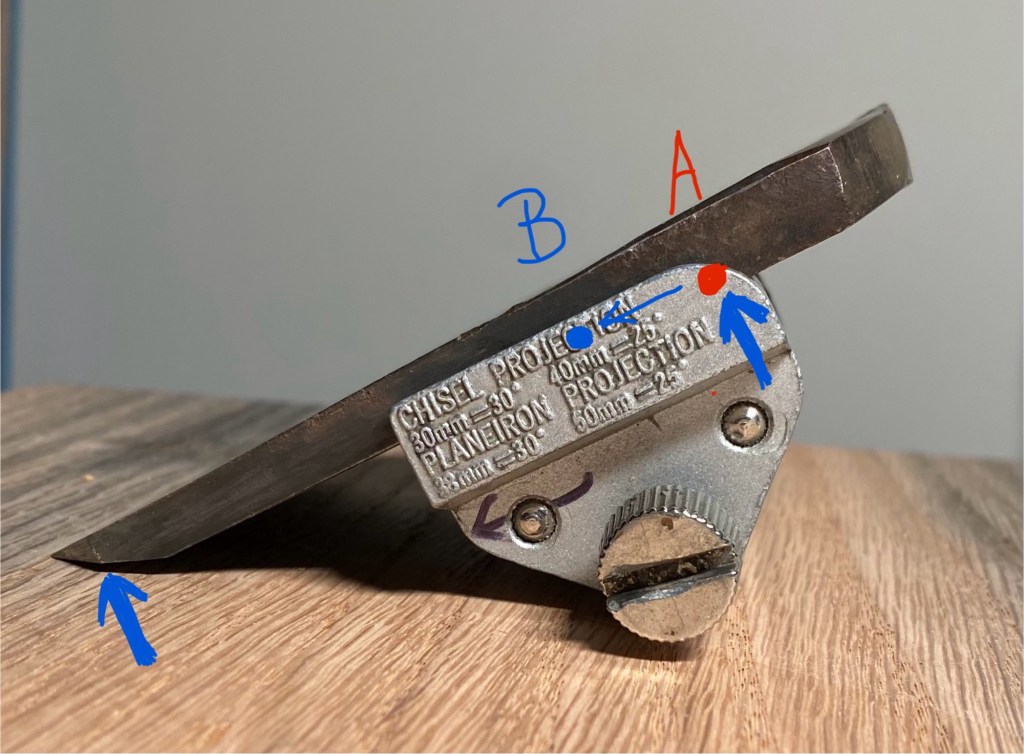
Using an unmodified Eclipse-type jig, putting pressure on the cutting edge causes the blade to rotate in the jig around the point labeled A, as the jig provides no support for the blade behind point A. By moving the pinch point forward to the point labeled B the jig can now provide support behind point B and resist rotation.
Chipbreaker – break it down
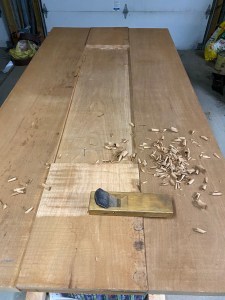
Laminating the oak boards together presented some planing challenges. The uneven grain in the boards and orienting the boards for best visual appearance created quite clashing grain directions. Cherry also has its’ challenges when hand planing. The satiny look of cherry that you get when it is oiled – called chatoyance – is caused by the wood grain gently rising up and down within a board. Planing against the grain can lead to “tear-out”. Tear-out occurs when the cutting edge of the plane lifts wood fibers away from the board and the wood fibers transmit this lifting force ahead of the cutting edge. If the wood fibers are diving down into the board, more wood will be removed by the lifting action than by cutting by the sharp metal edge. Mitigating strategies for tear-out include having a sharp blade, taking thin shavings, having a tight throat opening in the plane body, and planing with or across the grain (the wood fibers are rising out of instead of diving down into the board). However, these alternatives are sometimes not feasible or are not very efficient. Taking really thin shavings when you are trying to shape a wooden part can be really slow, that is you have to take 10 shavings of 0.001” thickness to remove a single 0.010” shaving. As for planing with the grain, laminating the oak boards together resulted in grain going different directions within the same region of the board.
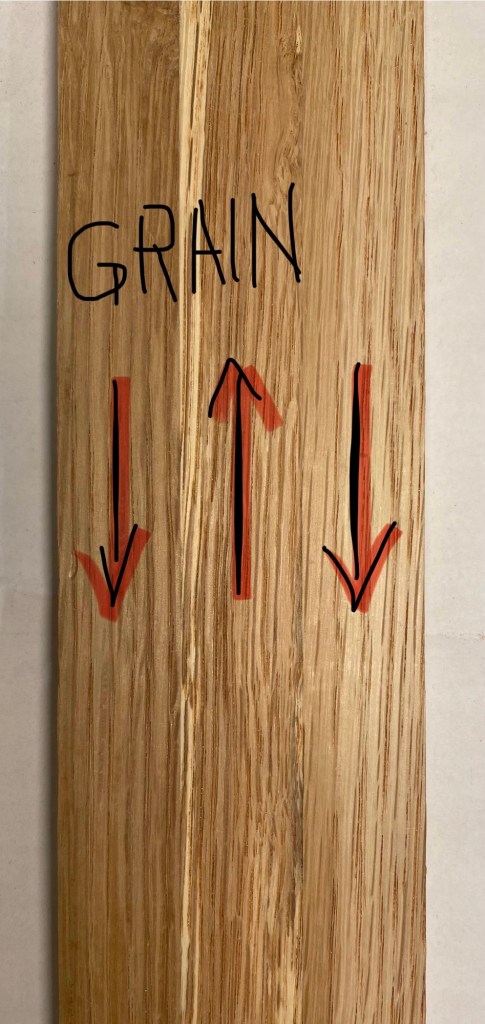
Three oak boards were laminated together to make the understructure of the table. These laminated boards had conflicting grain direction.
An alternative mitigation strategy involves using a chipbreaker. A chipbreaker allows the blade to be at a low cutting angle but puts back pressure on the wood chip as it rises up the blade so that the wood fibers can’t split out in front of the cutting edge. Essentially it provides a downward force on the wood fibers that counteracts the lifting force of the cutting edge. However in order for the chipbreaker to work properly, it needs to be really close to the cutting edge.
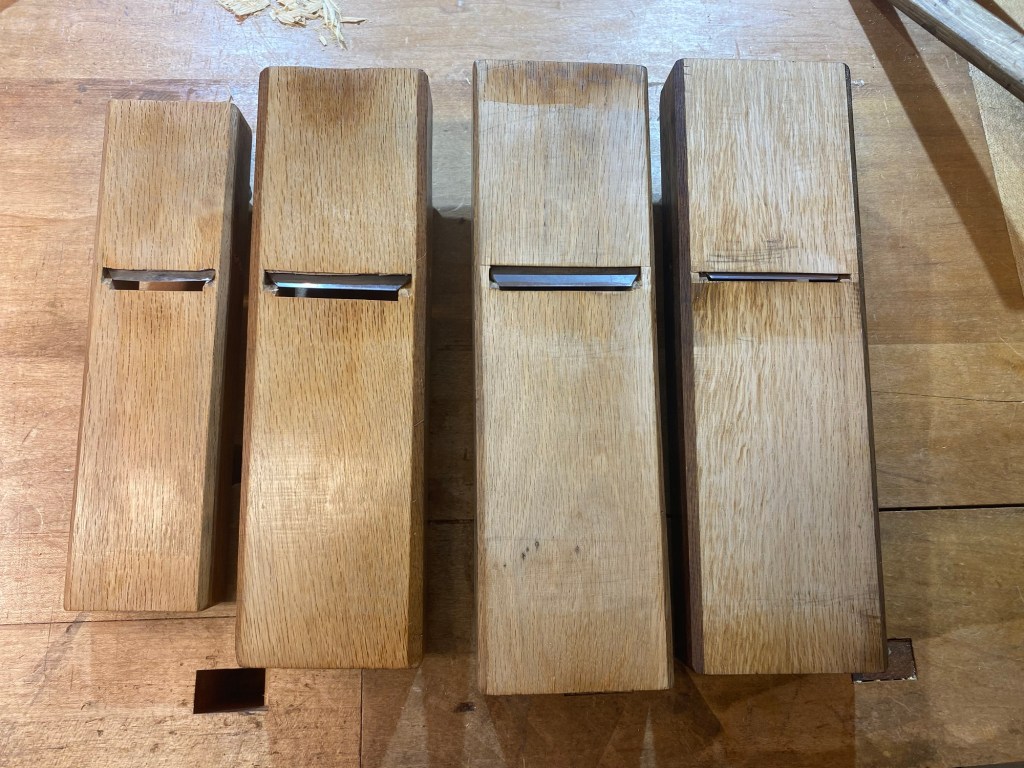
How close depends on how thick of a shaving you are taking. One of the ways that you can tell that the chipbreaker is working is that shaving changes characteristics. When the chipbreaker is not acting, the shaving tends to curl up in front of the blade. When it is acting, the shaving tends to flow straight out of the plane and goes over the back of the blade. Adjusting the width of the blade right at the cutting edge (by grinding back “ears” on the blade) relative to the width of the chipbreaker can really help you see where the chipbreaker is relative to the cutting edge from the bottom of the plane. Chris Hall has a great discussion of this in his kanna eBook, and I explore similar setup challenges in my post about restoring used Japanese hand planes.
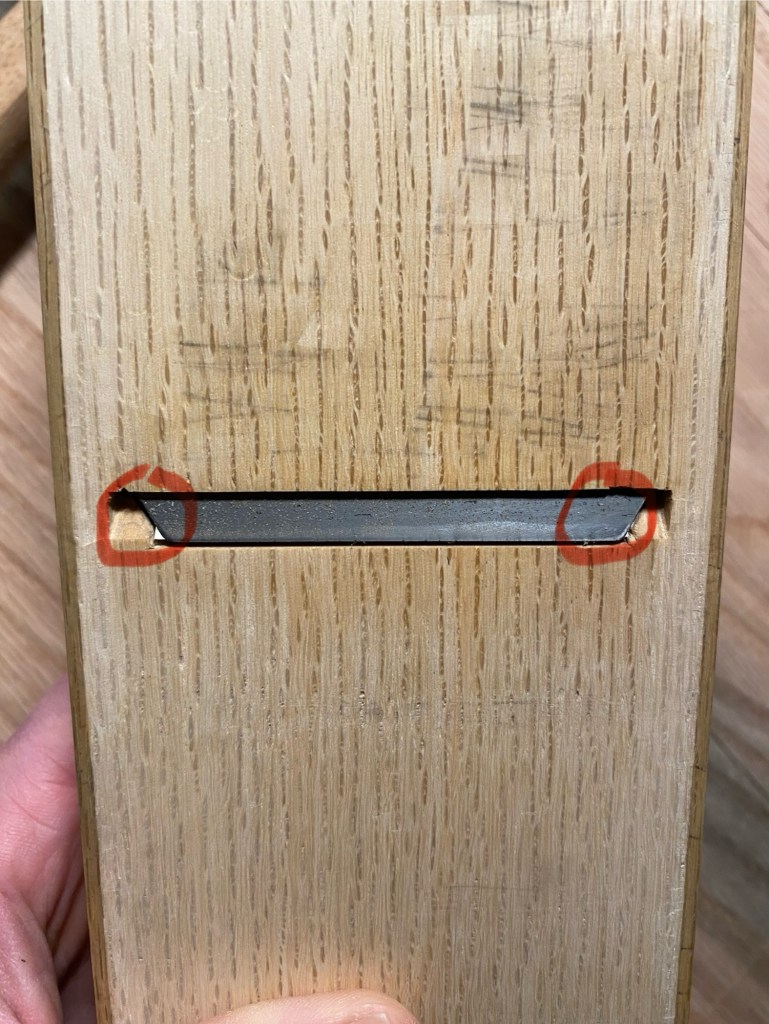
By grinding back the corners of the blade to create “ears”, you can see the corners of the chipbreaker peeking out (indicated by the red circles) from behind the blade. Instead of trying to look from the top of the plane, you can flip the plane over and easily see how close the chipbreaker is to the cutting edge.
Dialing in the right distance of the chipbreaker takes some “test-and-checking”, where you iteratively tap the chipbreaker forwards and check for the quality of the shaving until you are satisfied. Tapping the chipbreaker too far so that it goes beyond the edge can damage the cutting edge. This may necessitate resharpening the blade.
The advantage of a Japanese hand plane is that you can adjust the chipbreaker independently of the cutting edge and without removing the cutting edge from the plane body. In most western planes, the cutting edge and chipbreaker are screwed together. Any adjustment of the chipbreaker requires you to remove the entire assembly from the blade body.
Closing
The last point is that Japanese hand planes used for the rough and medium steps don’t need to be the most pristine hand planes that you own. I’ve found that refurbishing used Japanese kanna work well in these roles. Understanding the physics behind what makes a Japanese kanna work well will help you diagnose corrective actions to grant these tools new life in the workshop. Save your cash for that high quality finish kanna and some good wood to make something. With that, I wish you happy planing!
